起因
之前部署的云笔记系统的存储卷太小了,当用户数量增加的时候,笔记及用户信息会增大,这有可能会引起内存爆掉的情况。存储用户信息的 mysql和存储笔记信息的 mongodb在部署的时候我都设置了 1G的存储卷,这是远远不够的,因此需对其进行扩容。
根据老师要求,需将内存从 1G扩展到 50G,这是针对存笔记系统的 mongodb,为了更加稳妥,跟学弟协商后决定将存用户数据的 mysql也扩充到 10G。
大体思路:
- 确定
mongodb和 mysql的 pod所在的 node节点。
- 备份数据
- 删除旧的
pod
- 分别修改
mongodb和 mysql的 pv、 pvc为 50Gi、 10Gi。
- 指定
mongodb和 mysql的 pv、 pvc及 mongodb、 mysql部署的亲和性,让其部署在指定 node节点,便于扩容。
- 重新部署相应
pod
- 扩容指定的
mongodb、 mysql部署的节点的虚拟机。
注:本笔记图片里的 deployment的编号等信息可能会不一样,因为自己操作的时候可能会删了pod在重建导致其编号及时间等不一样,图片仅用于描述过程及结果。
1. 确定pod所在的node节点
首先远程连接 131服务器。
云笔记系统有 6个 pod,在 note空间里,如下所示:

需确定 mongodb、 mysql所在的 node节点,命令如下:
1
| kubectl get pod -n note -o wide
|

由上图可知, mongodb和 mysql的 pod分别被部署到了 k8s-node6、 k8s-node7节点。
2. 备份数据
问学长得知, k8s-node6、 k8s-node7节点位于 122服务器
远程连接 122服务器后,打开 VMWare Workstation Pro,登录 node6节点:
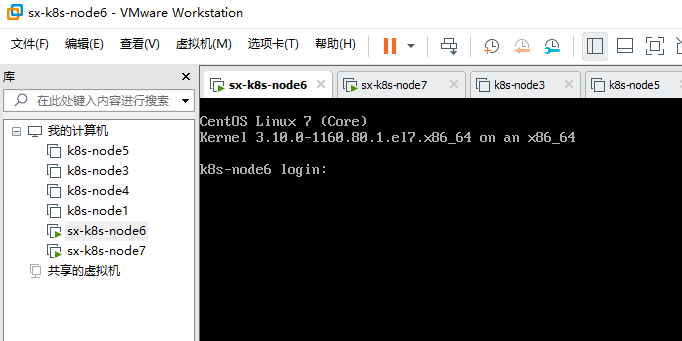
账号密码为 root 123456,登陆后如下:

按下面命令将数据拷贝到 tmp/backup文件夹下进行备份:

对 node7下的 mysql进行同样操作,不再赘述。
为了保险起见,使用 xShell中的 xftp将备份的文件再备份到桌面一份:
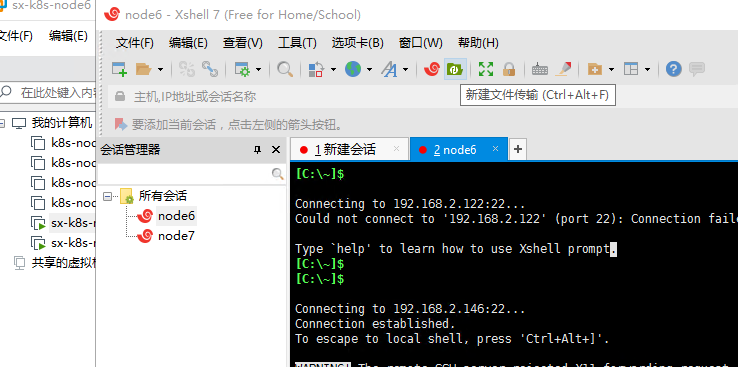
打开 xshell点击新建文件传输,将 /home下的 mongodb文件夹拖动到桌面。
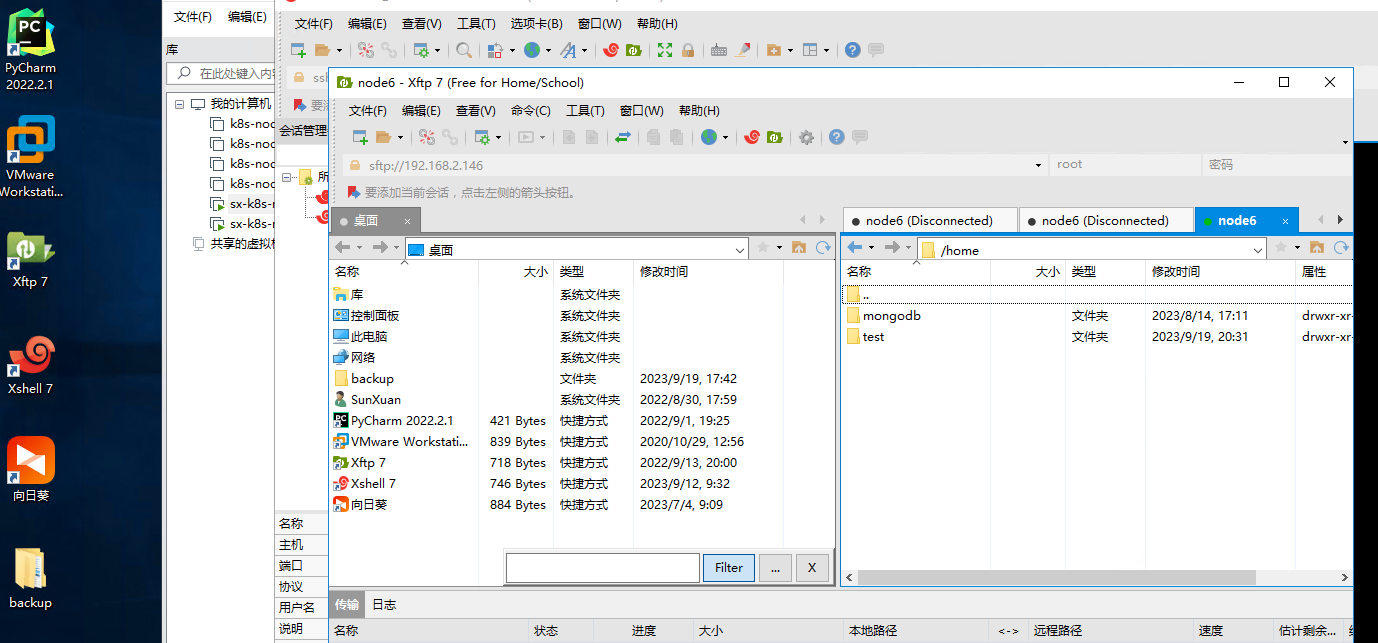
对 node7下的 mysql进行同样操作,不再赘述。
3. 删除旧的pod
删除旧的 pod:
1
2
3
4
| kubectl delete -f note-mysql-pvc.yaml -n note
kubectl delete -f note-mysql.yaml -n note
kubectl delete -f note-mongodb-pvc.yaml -n note
kubectl delete -f note-mongodb.yaml -n note
|
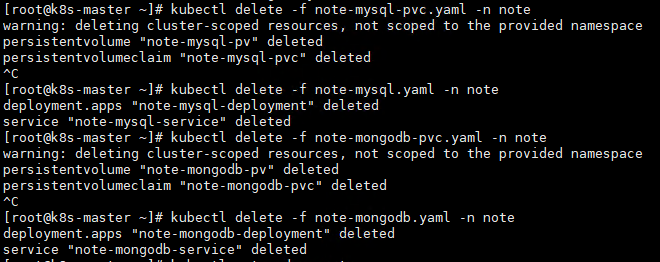
此时查看 pod结果:

mongodb和 mysql的 pod已经被删掉。
4. 修改pv、pvc
将相关的 yaml文件修改为如下内容:
note-mongodb-pvc.yaml
1
2
3
4
5
6
7
8
9
10
11
12
13
14
15
16
17
18
19
20
21
22
23
24
| apiVersion: v1
kind: PersistentVolume
metadata:
name: note-mongodb-pv
spec:
capacity:
storage: 50Gi
accessModes:
- ReadWriteOnce
hostPath:
path: /home/mongodb/data
---
apiVersion: v1
kind: PersistentVolumeClaim
metadata:
name: note-mongodb-pvc
spec:
accessModes:
- ReadWriteOnce
resources:
requests:
storage: 50Gi
storageClassName: ""
volumeName: note-mongodb-pv
|
note-mysql-pvc.yaml
1
2
3
4
5
6
7
8
9
10
11
12
13
14
15
16
17
18
19
20
21
22
23
24
| apiVersion: v1
kind: PersistentVolume
metadata:
name: note-mysql-pv
spec:
capacity:
storage: 10Gi
accessModes:
- ReadWriteOnce
hostPath:
path: /home/mysql/data
---
apiVersion: v1
kind: PersistentVolumeClaim
metadata:
name: note-mysql-pvc
spec:
accessModes:
- ReadWriteOnce
resources:
requests:
storage: 10Gi
storageClassName: ""
volumeName: note-mysql-pv
|
yaml文件里已经将内存修改为目标内存。
5. 指定亲和性
这里的亲和性是 Affinity,指定了这个后会让其部署在指定标签的 node节点上。这样仅需将指定的 node节点的虚拟机扩容即可。
首先需要为 node节点添加标签。如下所示:
1
2
3
4
5
| kubectl get nodes --show-labels
kubectl label nodes k8s-node6 notelabel=mongodb
kubectl label nodes k8s-node7 notelabel=mysql
|

指定完标签就可以添加亲和性了,如下:
note-mongodb-pvc.yaml
1
2
3
4
5
6
7
8
9
10
11
12
13
14
15
16
17
18
19
20
21
22
23
24
25
26
27
28
29
30
31
32
| apiVersion: v1
kind: PersistentVolume
metadata:
name: note-mongodb-pv
spec:
capacity:
storage: 50Gi
accessModes:
- ReadWriteOnce
hostPath:
path: /home/mongodb/data
nodeAffinity:
required:
nodeSelectorTerms:
- matchExpressions:
- key: notelabel
operator: In
values:
- mongodb
---
apiVersion: v1
kind: PersistentVolumeClaim
metadata:
name: note-mongodb-pvc
spec:
accessModes:
- ReadWriteOnce
resources:
requests:
storage: 50Gi
storageClassName: ""
volumeName: note-mongodb-pv
|
note-mysql-pvc.yaml
1
2
3
4
5
6
7
8
9
10
11
12
13
14
15
16
17
18
19
20
21
22
23
24
25
26
27
28
29
30
31
32
| apiVersion: v1
kind: PersistentVolume
metadata:
name: note-mysql-pv
spec:
capacity:
storage: 10Gi
accessModes:
- ReadWriteOnce
hostPath:
path: /home/mysql/data
nodeAffinity:
required:
nodeSelectorTerms:
- matchExpressions:
- key: notelabel
operator: In
values:
- mysql
---
apiVersion: v1
kind: PersistentVolumeClaim
metadata:
name: note-mysql-pvc
spec:
accessModes:
- ReadWriteOnce
resources:
requests:
storage: 10Gi
storageClassName: ""
volumeName: note-mysql-pv
|
note-mongodb.yaml
1
2
3
4
5
6
7
8
9
10
11
12
13
14
15
16
17
18
19
20
21
22
23
24
25
26
27
28
29
30
31
32
33
34
35
36
37
38
39
40
41
42
43
44
45
46
47
48
49
50
51
52
53
54
| apiVersion: apps/v1
kind: Deployment
metadata:
name: note-mongodb-deployment
spec:
replicas: 1
selector:
matchLabels:
app: note-mongodb-pod
template:
metadata:
labels:
app: note-mongodb-pod
spec:
affinity:
nodeAffinity:
requiredDuringSchedulingIgnoredDuringExecution:
nodeSelectorTerms:
- matchExpressions:
- key: notelabel
operator: In
values:
- mongodb
containers:
- name: note-mongodb
image: registry.cn-hangzhou.aliyuncs.com/lucas-njfu/note-mongodb:v1.1.0
imagePullPolicy: IfNotPresent
ports:
- containerPort: 27017
env:
- name: MONGO_INITDB_ROOT_USERNAME
value: admin
- name: MONGO_INITDB_ROOT_PASSWORD
value: 5c8b18289f7848e9b0af98e81562649d
volumeMounts:
- name: note-mongodb-persistent-storage
mountPath: /data/db
volumes:
- name: note-mongodb-persistent-storage
persistentVolumeClaim:
claimName: note-mongodb-pvc
---
apiVersion: v1
kind: Service
metadata:
name: note-mongodb-service
spec:
selector:
app: note-mongodb-pod
type: NodePort
ports:
- port: 27017
nodePort: 30017
targetPort: 27017
|
note-mysql.yaml
1
2
3
4
5
6
7
8
9
10
11
12
13
14
15
16
17
18
19
20
21
22
23
24
25
26
27
28
29
30
31
32
33
34
35
36
37
38
39
40
41
42
43
44
45
46
47
48
49
50
51
52
| apiVersion: apps/v1
kind: Deployment
metadata:
name: note-mysql-deployment
spec:
replicas: 1
selector:
matchLabels:
app: note-mysql-pod
template:
metadata:
labels:
app: note-mysql-pod
spec:
affinity:
nodeAffinity:
requiredDuringSchedulingIgnoredDuringExecution:
nodeSelectorTerms:
- matchExpressions:
- key: notelabel
operator: In
values:
- mysql
containers:
- name: note-mysql
image: registry.cn-hangzhou.aliyuncs.com/lucas-njfu/note_mysql:v1.1.0
imagePullPolicy: IfNotPresent
env:
- name: MYSQL_ROOT_PASSWORD
value: dfa6f1b032ee42ed95d12647225f2ff4
ports:
- containerPort: 3306
volumeMounts:
- name: note-mysql-persistent-storage
mountPath: /var/lib/mysql
volumes:
- name: note-mysql-persistent-storage
persistentVolumeClaim:
claimName: note-mysql-pvc
---
apiVersion: v1
kind: Service
metadata:
name: note-mysql-service
spec:
selector:
app: note-mysql-pod
type: NodePort
ports:
- port: 3306
nodePort: 30006
targetPort: 3306
|
这样,亲和性就修改完毕了。
6. 重新部署相应的pod
接下来按 5. 指定亲和性 所修改的 yaml重新进行 pod部署:
1
2
3
4
| kubectl create -f note-mysql-pvc.yaml -n note
kubectl create -f note-mysql.yaml -n note
kubectl create -f note-mongodb-pvc.yaml -n note
kubectl create -f note-mongodb.yaml -n note
|
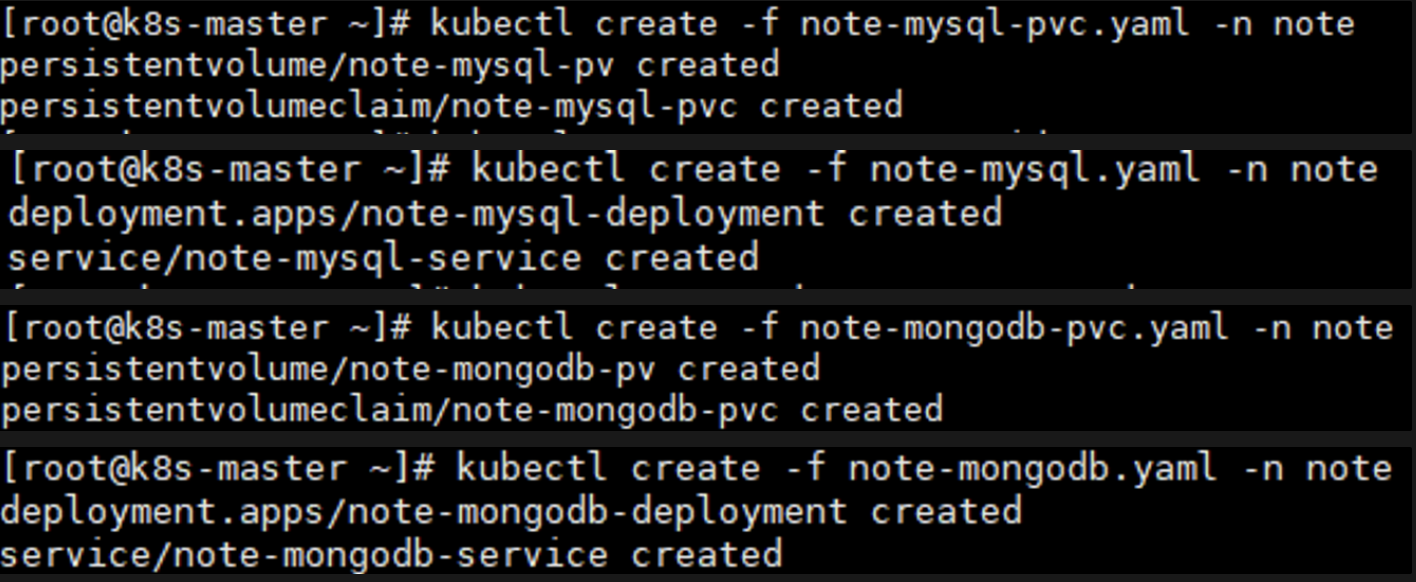
查看部署的结果:
1
| kubectl get pod -n note -o wide
|

可以看到已经将 mongodb和 mysql分别部署到了节点 6和 7上。
7. 扩容节点的虚拟机
远程连接 122服务器后,打开 VMWare Workstation Pro,如下:

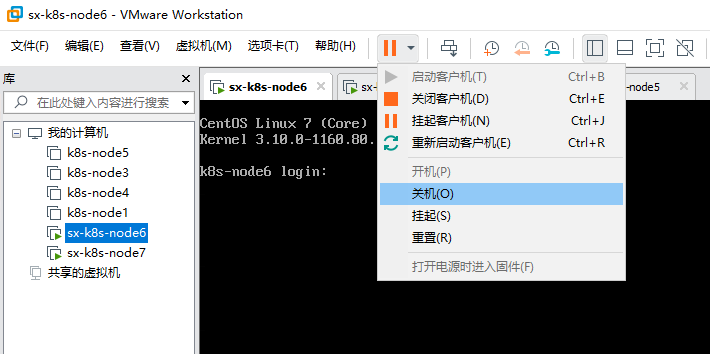
对于 sx-k8s-node6,先双击,然后点击上面的橙色运行按钮右边的下拉倒三角,关机。
然后右键 sx-k8s-node6,点设置

点击硬盘后点击右下角扩展

对硬盘容量进行修改。
这里原本是 40G,我增加了 50G后变为了 90G。
sx-k8s-node7的操作类似,不再赘述。
此时打开网址,访问成功!扩容成功!
访问
访问(连校园网,关梯子):
http://192.10.84.209:33395/cloudNote/
账号:姓名小写拼音
密码:123456
效果:


